

Home → Global Settings → Organization → User Console → Click Create User → Fill in Required Details → Click Create
Create a New User
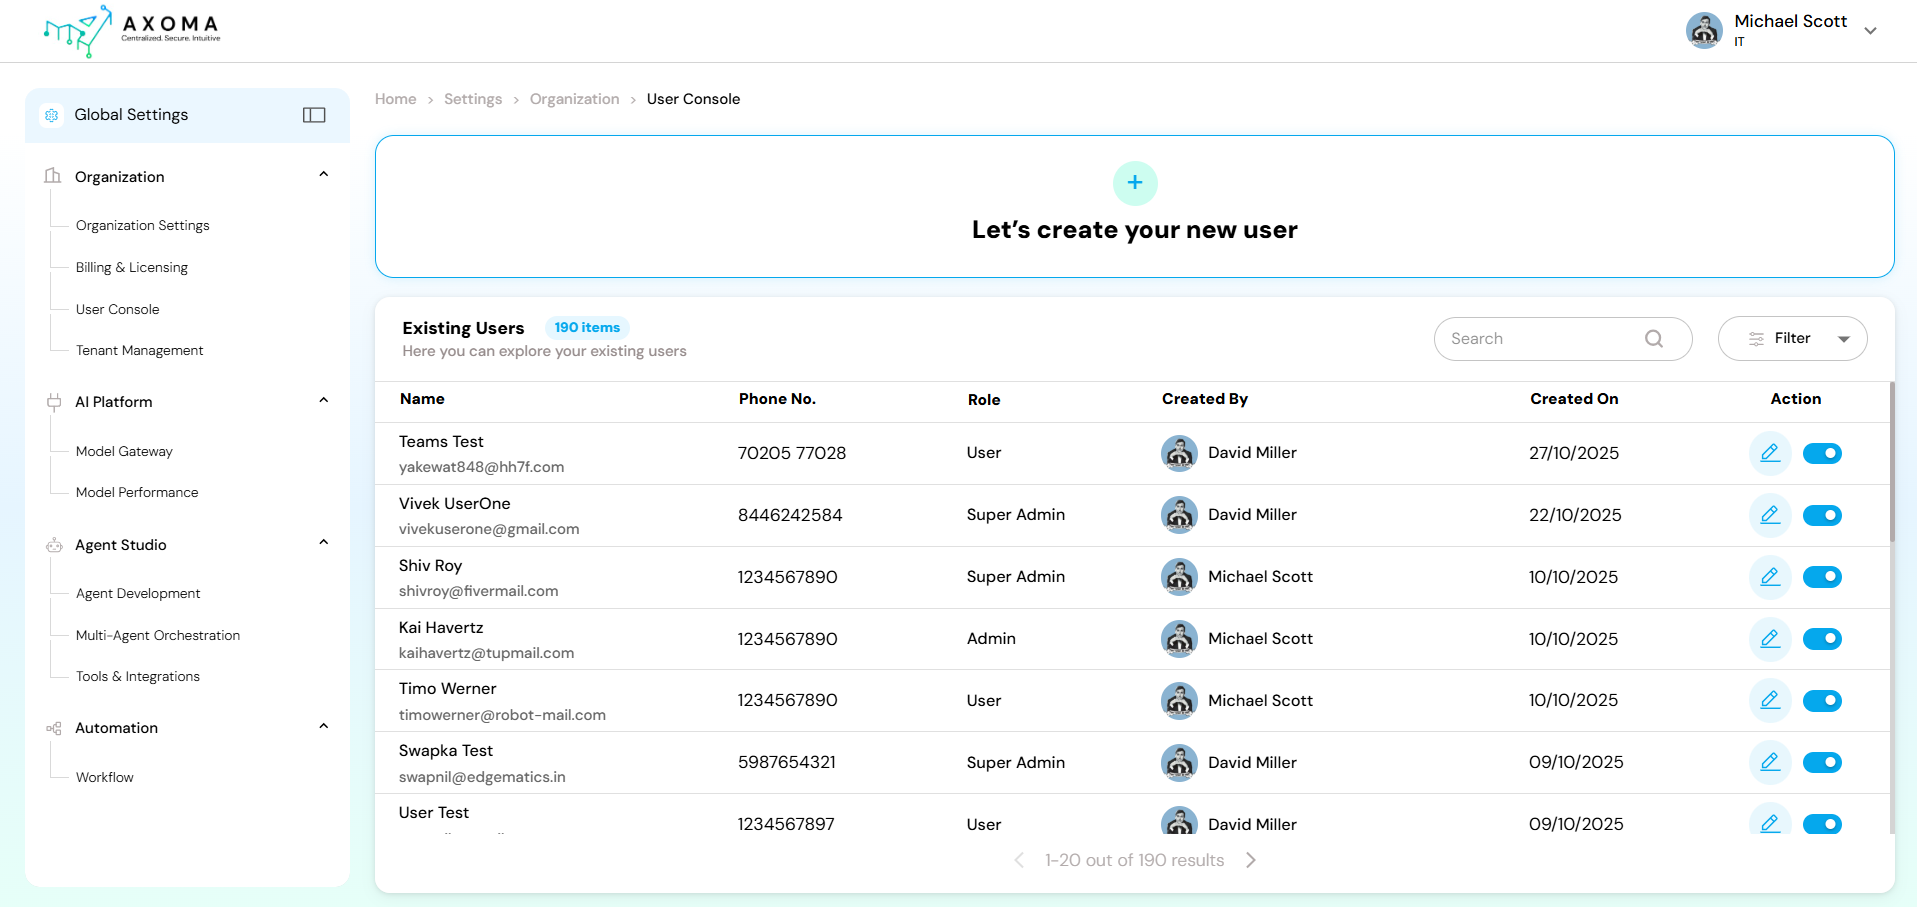
To add a new user in Axoma, navigate to the Global Settings section in the left navigation panel, then select User Console. At the top of the screen, you’ll see a section titled “Let’s create your new user” with a plus (+) icon. Clicking on this icon opens the user creation form.⚠️ Important: Once a user is created, login credentials are securely sent to the registered email address.
 User Creation Form Details
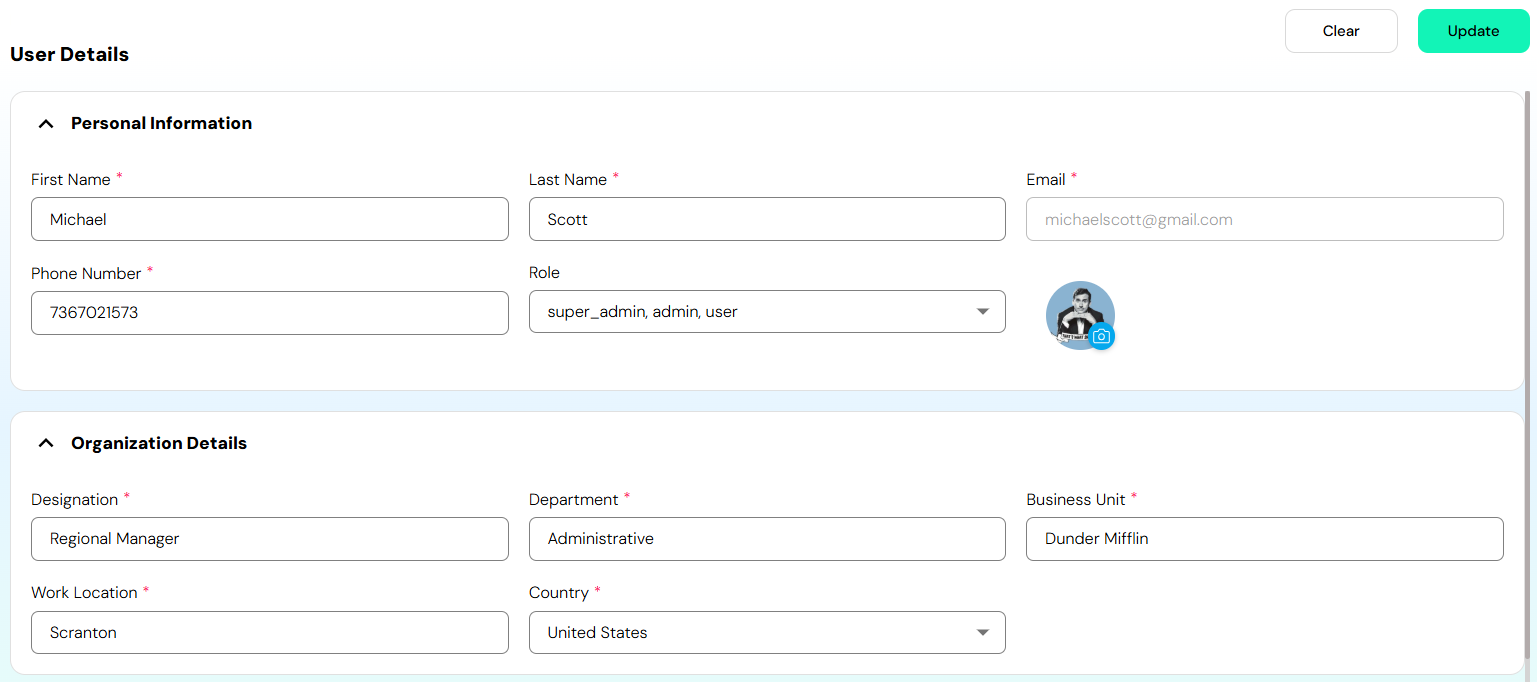
The form requires both personal information and organization-related details to successfully create a new user profile:
User Creation Form Details
The form requires both personal information and organization-related details to successfully create a new user profile:
Personal Information
- First Name: Enter the user’s given name. This will be used across the platform to identify the user.
- Last Name: Enter the user’s surname or family name for full identification.
- Email: Provide the user’s official email address. This serves as their primary identifier and is required for login and communication purposes.
- Phone Number: Enter a valid mobile or contact number. This may be used for account verification or direct contact.
Organization Details
- Role: Select the access level for the user. By default, the role is set to User. Roles define the permissions and control the level of access a user has within Axoma.
- Designation: Provide the user’s job title or role in the organization (e.g., Data Analyst, Product Manager).
- Department: Mention the department the user belongs to, such as IT, HR, Marketing, or Sales. This helps in grouping and filtering users by internal teams.
- Business Unit: Indicate the specific business unit or division the user is associated with (e.g., Enterprise Solutions, AI Research).
- Work Location: Specify the office or regional location where the user is based (e.g., Pune Office, Remote).
- Country: Enter the country where the user operates from. This is useful for compliance and regional access configurations.
Profile Picture Upload
You can also upload a profile picture for the user. This visual identification helps personalize the experience and is displayed throughout the platform where user profiles are referenced. Once all fields are filled click on ‘Save’ button, submitting the form will create the user and list them under Existing Users.Edit an Existing User
You can update a user’s information or adjust their access by using the edit icon (pencil) located under the Action column in the user list.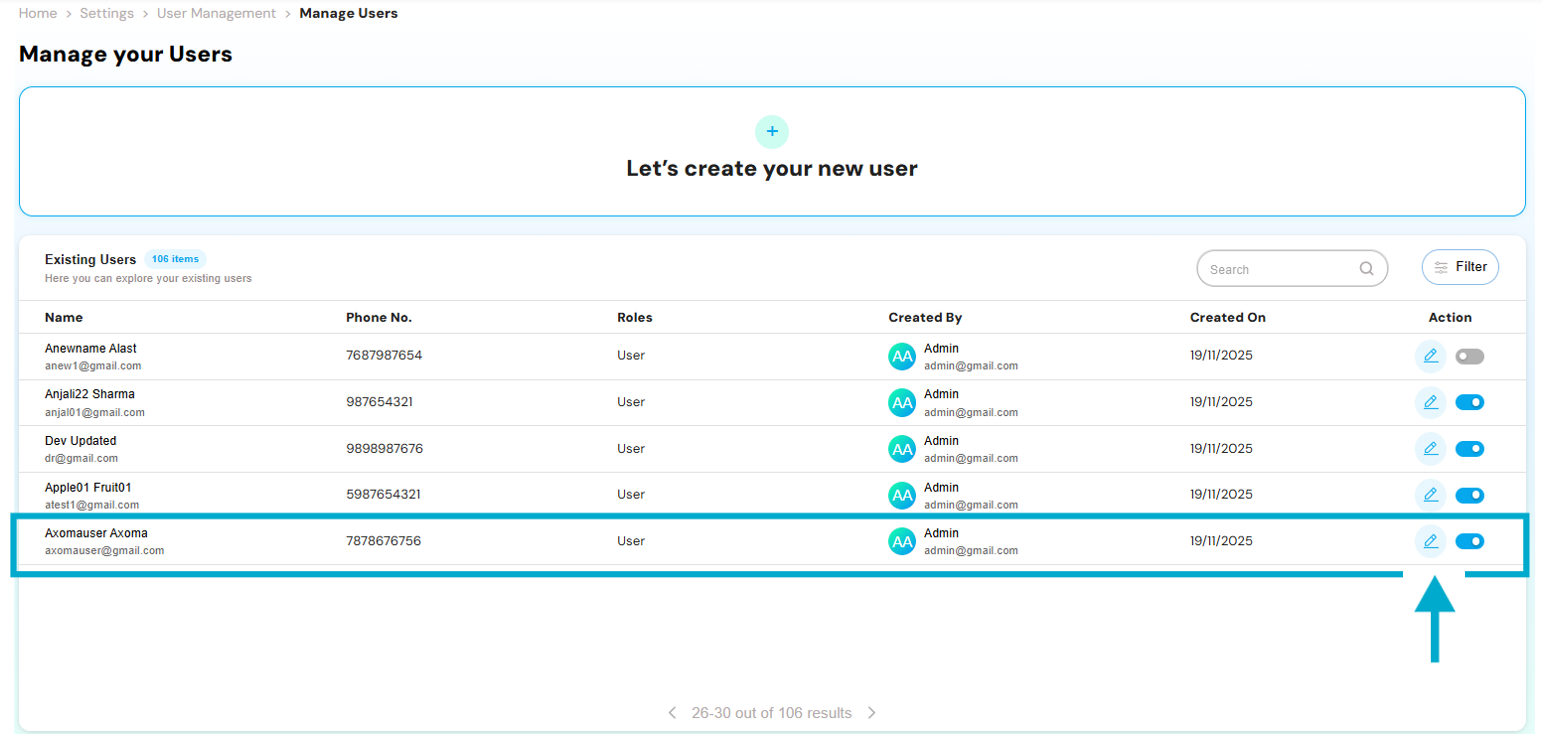 Editable Fields
When editing a user, the form allows you to change all previously submitted details, including:
Editable Fields
When editing a user, the form allows you to change all previously submitted details, including:
- First and Last Name
- Email Address
- Phone Number
- Role (with options to switch between User, Admin, and Super Admin)
- Designation, Department, Business Unit, Work Location, and Country
- Profile Picture (can be updated or replaced)
View Assigned Resources
In addition to editing, this section provides a comprehensive view of the user’s involvement in the platform:- Assigned Tenants: Lists all the tenants that the user has been granted access to.
- Assigned Applications: Displays the apps within Axoma that the user is currently linked to.
Enable or Disable Users
Axoma provides a convenient way to control user access without deleting their profile by using the Enable/Disable toggle switch available in the user list.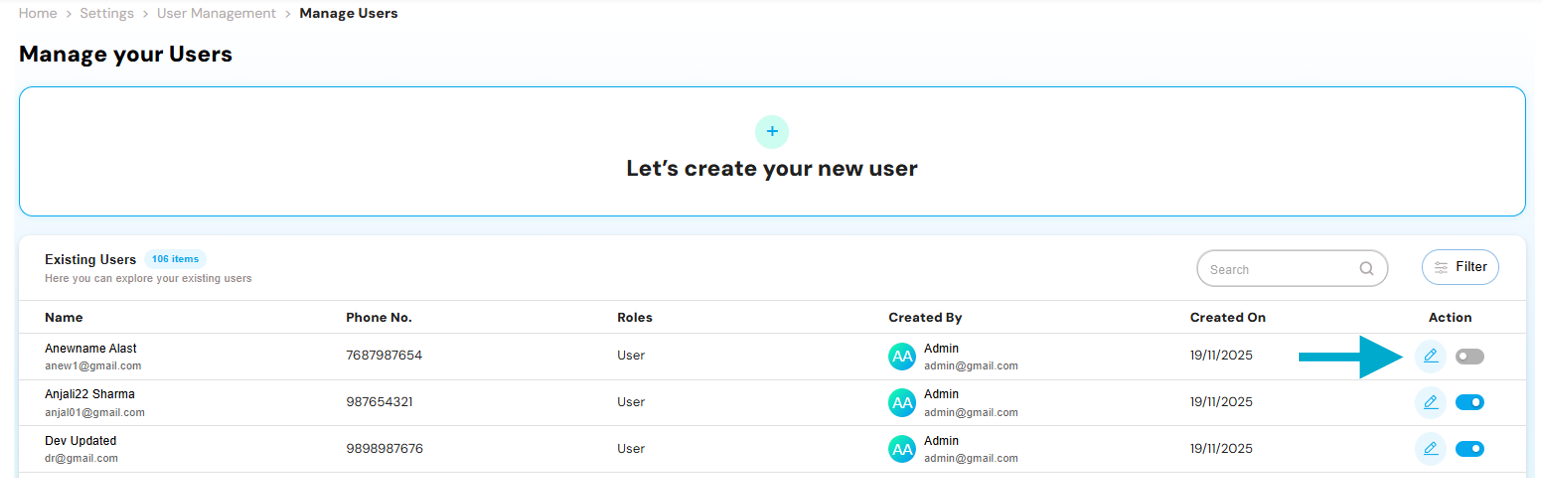 How it Works
Within the Existing Users section, each user row has a toggle switch under the Action column. This toggle controls whether the user is active (enabled) or inactive (disabled).
How it Works
Within the Existing Users section, each user row has a toggle switch under the Action column. This toggle controls whether the user is active (enabled) or inactive (disabled).
- Enabled (Toggle On) When the switch is turned on, the user is considered active. They can log in to the platform, access assigned tenants and applications, and perform actions based on their assigned role (User, Admin, or Super Admin).
- Disabled (Toggle Off) When the switch is turned off, the user is marked as inactive. They are restricted from logging in and cannot access any features or data within the platform. However, their profile and associated information are not deleted — allowing for reactivation in the future without re-entering user details.
Use Cases
- Temporarily restrict access during leave or role change.
- Deactivate users who have left the organization without losing historical data.
- Pause access for auditing or security review.